Wizard
The SOFiSTiK Analytical Model Generator Side Panel includes a Wizard which guides you through the multi-step process of achieving a cleaner model for your analysis.
The following steps are involved:
General Settings
Category |
Description |
Default Value |
|---|---|---|
Configuration |
Select the configuration file used during the process. To learn more, see Settings. |
“Default” |
Start View |
The wizard is operational in one view only. This view will be the Active View when clicking |
none |
Step 1: Filter Elements
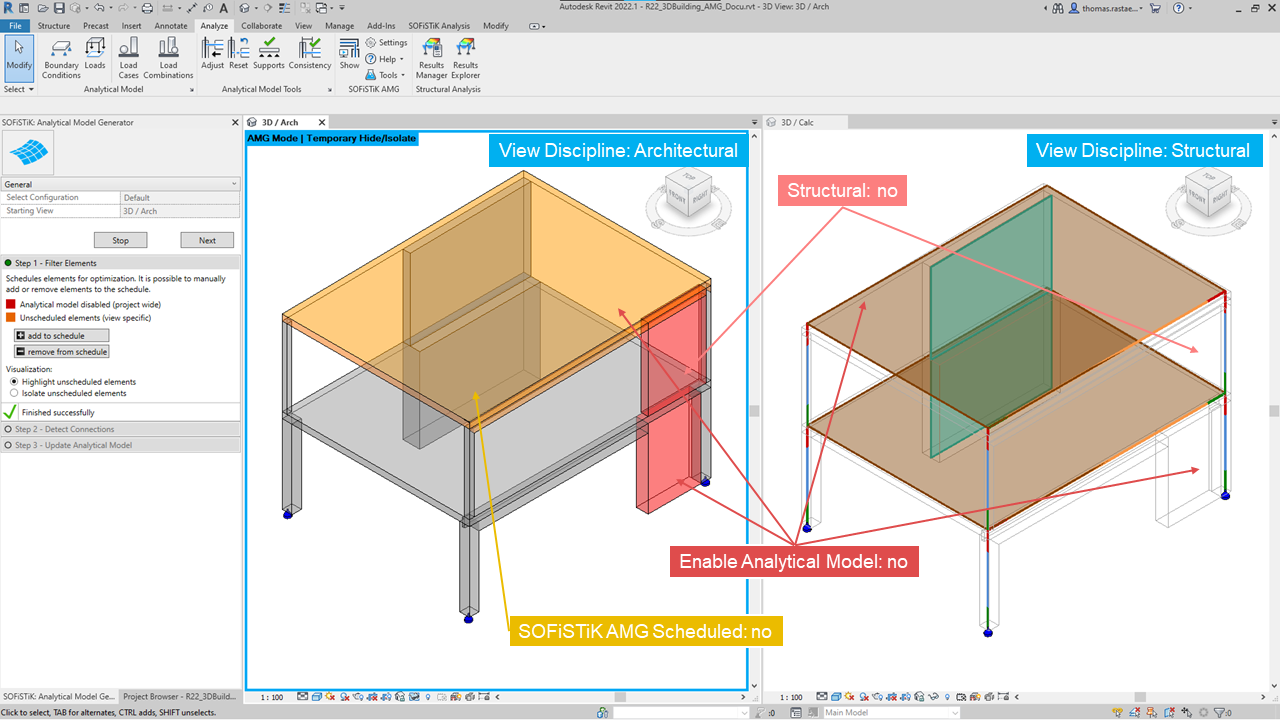
GUI Wizard Step 1 - Highlighting of Elements (click on image to enlarge)
This step contains the following parts:
Enable or disable the Analytical Model
Elements, for which the Analytical Model (Analytical Floor, Analytical Wall, Analytical Beam or Analytical Column) is disabled, are highlighted in red.
The user needs to manually change this setting by adjusting the Revit-native parameters
StructuralandEnable Analytical Modelin the properties.Warning
Enabling/disabling the analytical model for certain elements is a global adjustment and will result in changes throughout the project. Disabled elements will be removed and certain properties may be lost permanently. Enabled elements will become visible in all views where they are not hidden due to a Analytical Model Category Override or Filter.
Note
The element needs to be rescheduled manually or Step 1: Filter Elements repeated. If the analytical element remains disabled, it will be disregarded during the further process.
Schedule or unschedule elements for optimization
A rule-based filter helps the user to identify irrelevant elements, e.g., short beams or walls. Such elements will be disregarded (unscheduled) for the further process and hidden from view after Step 1: Filter Elements. They are highlighted in orange.
The user can decide to
remove additional elements from the schedule or
take filtered elements back into the schedule with the respective commands.
Note
The
SOFiSTiK_AMG_Scheduledparameter is used to label these elements. The information, which rule unscheduled the element, is written toSOFiSTiK_AMG_Comments.Hint
Different visibility settings allow to highlight or isolate unscheduled elements to evaluate the filter. SOFiSTiK Analytical Model Generator uses the following Revit technology for visualization:
Temporary Hide/Isolate
Entering Step 1, the visible elements from the Start View get loaded to a Temporary Hide/Isolate mode to respect the user selection, independently from using Overrides by Model Category, Filters or individual Hide by Element.
Temporary View Template
A set of View Templates is provided with the installation. During the steps of the Wizard, they are activated as Temporary View Templates to control various display settings, e.g., Category Overrides and Filters for better visibility of the relevant elements.
See also
To change the filter rules, change the presets in the configuration file under Step 1 - Filter Elements.
Step 2: Detect Connections
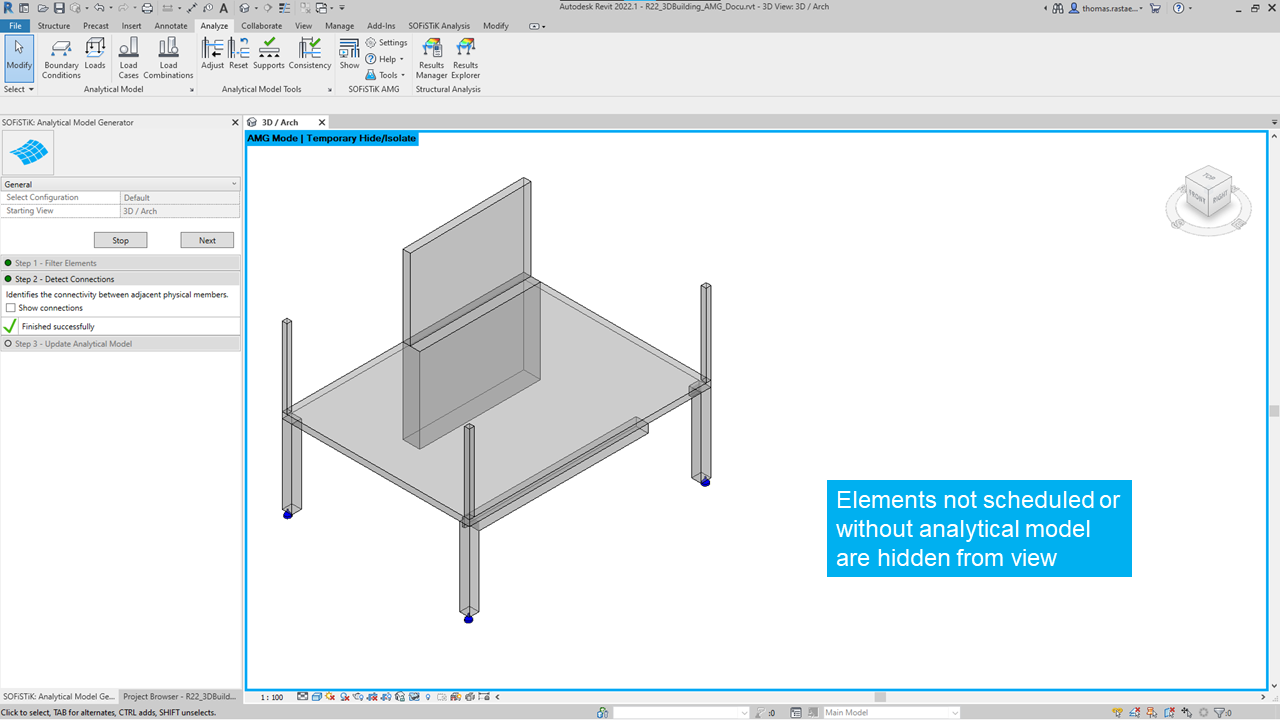
GUI Wizard Step 2 - Connections of Elements (click on image to enlarge)
A Connection Graph is established by the program, determining the relationship between the scheduled elements. It is possible to visualize the connections.
Important
During this process hosted data (e.g., line and area loads and boundary conditions) is deleted. The data is re-established after the successful completion of Step 3 or when the wizard gets exited via Stop. Unexpected exits, e.g., closing the application mid-workflow, may result in a loss of data. Please note that the new hosted data has different IDs.
Step 3: Update Analytical Model
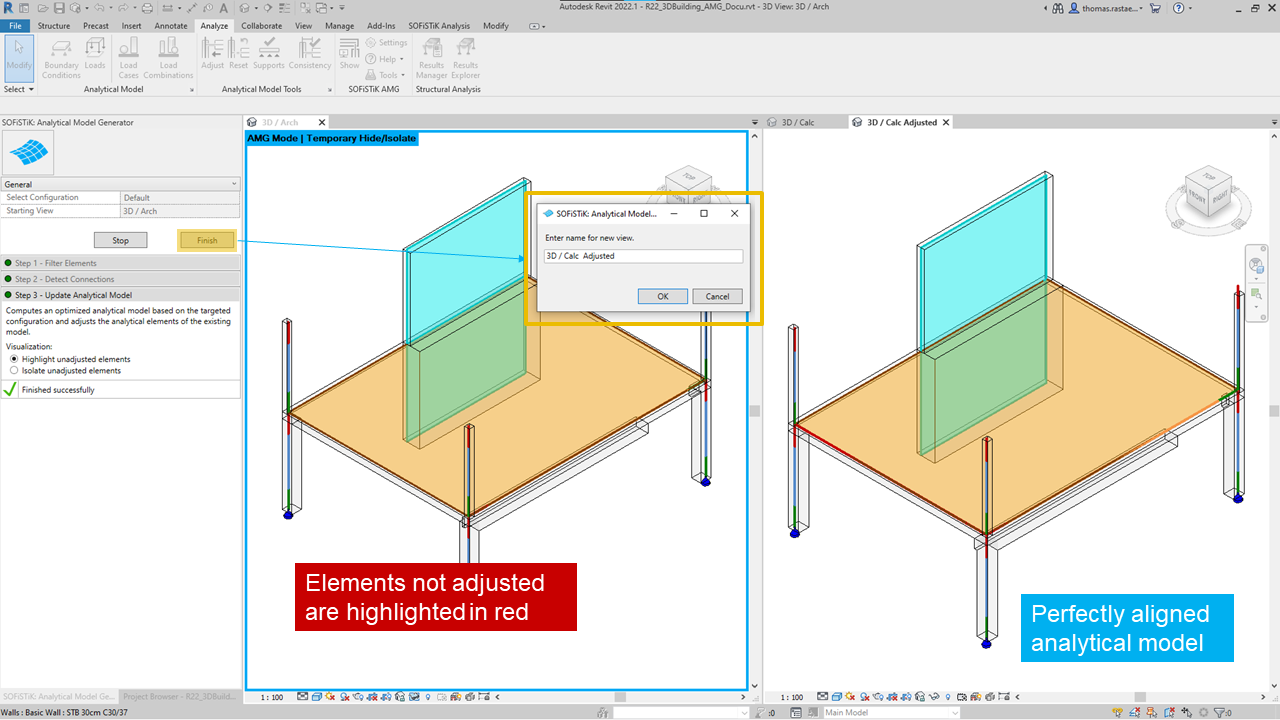
GUI Wizard Step 3 - Highlighting of Unadjusted Elements (click on image to enlarge)
The analytical model gets updated by changing the projection of all the elements.
The information, if an element cannot be adjusted, is written to SOFiSTiK_AMG_Comments.
Different visibility settings allow to highlight or isolate the unadjusted elements to evaluate them.
See also
To tweak the optimization, change the presets in the configuration file under Step 3 - Adjust Analytical Model.


